


If this is your first time looking at a post from this series, have a look at this summary: Server Setup 0: Contents
Install Apache
Now we’ll install the software that actually serves webpages to your browser.
Install apache
sudo apt install apache2
check it’s running:
sudo systemctl status apache2
The output should look something like this:
sandy@waldorf:/mnt$ sudo systemctl status apache2
● apache2.service - The Apache HTTP Server
   Loaded: loaded (/lib/systemd/system/apache2.service; enabled; vendor preset: enabled)
   Active: active (running) since Tue 2020-05-19 13:41:38 BST; 21s ago
     Docs: https://httpd.apache.org/docs/2.4/
 Main PID: 1128 (apache2)
    Tasks: 55 (limit: 4523)
   Memory: 18.0M
   CGroup: /system.slice/apache2.service
           ├─1128 /usr/sbin/apache2 -k start
           ├─1129 /usr/sbin/apache2 -k start
           └─1130 /usr/sbin/apache2 -k start
Press q if it won’t let you do anything else after showing this message.
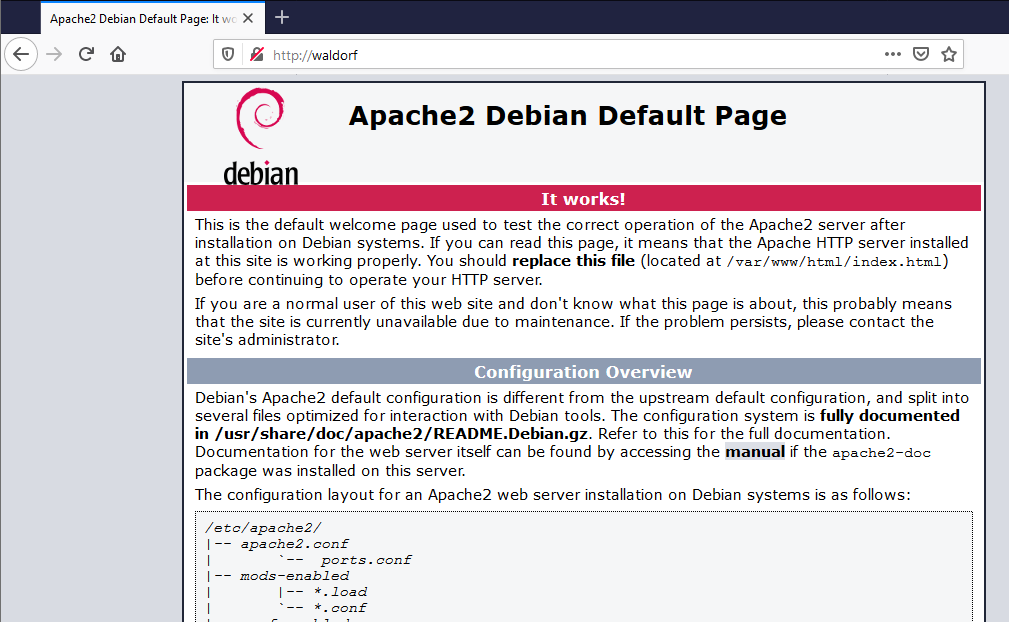
Let’s test it!
On your client pc, open a web browser and type in http://hostname or http://xxx.xxx.xxx.xxx swapping the hostname or IP address of your server as approprite. You need to type the “http://” otherwise your browser will think you’re doing a search. You should see a page like this:
Additional test configuration
This step is optional, but may help later. We’ll configure a test site that will give us lots of useful information about our websever, great for debugging if (when) something goes doesn’t work.
First, pick a domain name. If you already own one you want to use for this site, then use that otherwise you can make something up. I’ll use example.org for this tutorial. Our test site will be at a subdomain: test.example.org
first, create a directory to hold files we want to test:
sudo mkdir /var/www/test
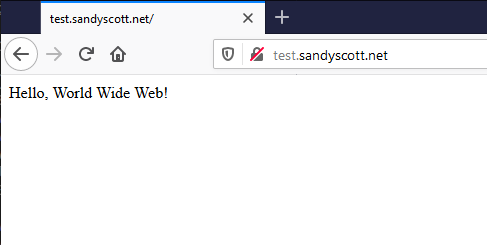
make an index.html in this folder
sudoedit /var/www/test/index.html
"Hello, world wide web!"Normally this file would contain html tags, but this’ll do for a quick test
Create test.conf in /etc/apache2/sites-available
sudoedit /etc/apache2/sites-available/test.conf
<VirtualHost *:80>
ServerName test.example.org
DocumentRoot /var/www/test
<Location />
Require ip 192.168.2.0/24
</Location>
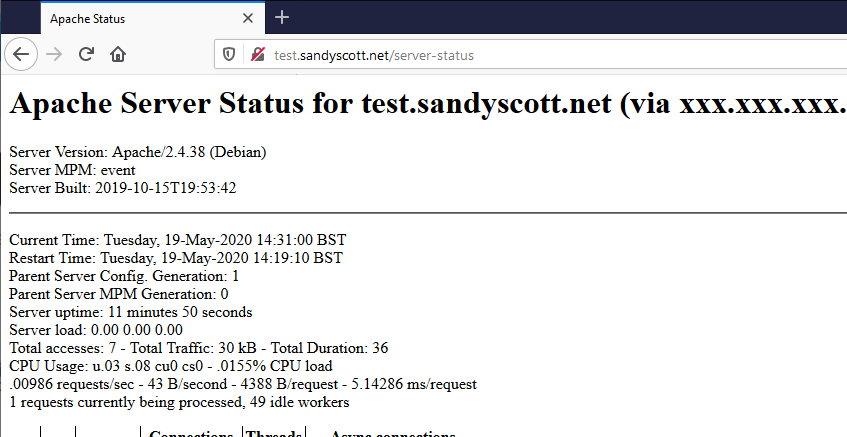
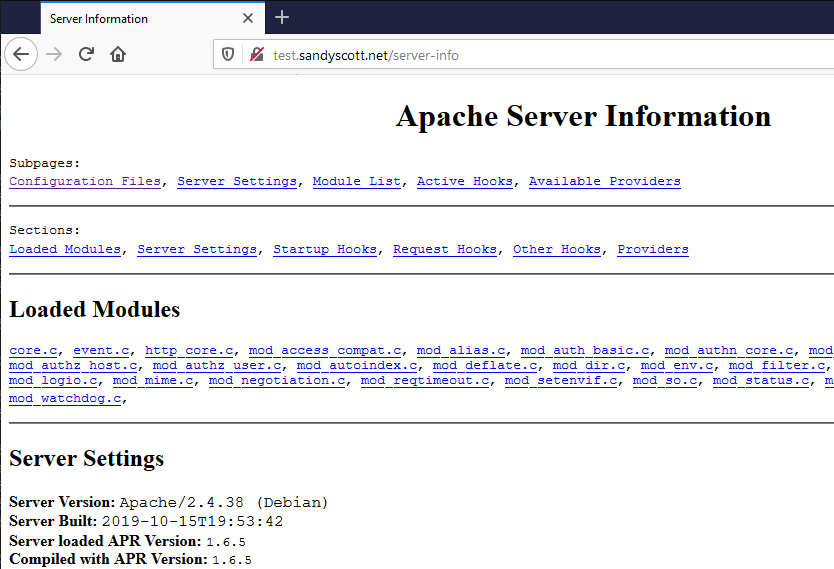
<Location "/server-info">
SetHandler server-info
</Location>
<Location "/server-status">
SetHandler server-status
</Location>
ErrorLog ${APACHE_LOG_DIR}/test_error.log
CustomLog ${APACHE_LOG_DIR}/test_access.log combined
</VirtualHost>You should modify the xxx.xxx.xxx to the first 3 blocks of the server’s IP address on your network.
This sets up a website that can show a lot of useful information, and the Require lines mean it’s only accessible from inside your network. Maybe I’ll break down the contents of this in a later blog post. Comment if you’d like to see that.
Enable mod_info which will allow you to see lots of useful debugging information
sudo a2enmod info
Finally, enable the site and restart apache
sudo a2ensite test
sudo systemctl restart apache2
Last step, configure the hosts file on your client
Windows
Open notepad as an Administrator
Add a line which has
xxx.xxx.xxx.xxx test.example.org… swapping in your server ip address and the domain name you chose above.
Go to these addresses and see if it works
test.example.org
test.example.org/server-status
test.example.org/server-info
If that’s all working, we’re good to move onto the next step!