If this is your first time looking at a post from this series, have a look at this summary: Server Setup 0: Contents
The final of the 3 big pieces – this provides document editing capability in Nextcloud.
Install Collabora
There are a couple of ways to install Collabora, and the recommended way is to use a Docker image. That isn’t ideal for us because the Docker version will use more resources which we can’t afford if you’re running this on something old. Instead, Collabora provide respositories, so these commands will:
- Install a little tool me we need
- Get the security keys so the repository is safe to use
- Add the repository to our
/etc/apt/sources.list. - Install Collabora
sudo apt install gnupg
sudo apt-key adv --keyserver keyserver.ubuntu.com --recv-keys 0C54D189F4BA284D
sudo echo 'deb https://www.collaboraoffice.com/repos/CollaboraOnline/CODE-debian10 ./' | sudo tee -a /etc/apt/sources.list
sudo apt update && sudo apt install loolwsd code-brand
Configure Collabora
Modify /etc/loolwsd/loolwsd.xml
sudoedit /etc/loolwsd/loolwsd.xml
We’ll disable SSL in collabora itself, because Apache will handle that. Find <ssl desc="SSL settings">. Look at the line below. Change the second-to last word to false. It should now be this:
<enable type="bool" desc="Controls whether SSL encryption between browser and loolwsd is enabled (do not disable for production deployment). If default is false, must first be compiled with SSL support to enable." default="true">false</enable>
In the line below that, the second-to last word should be true.
<termination desc="Connection via proxy where loolwsd acts as working via https, but actually uses http." type="bool" default="true">true</termination>
Now find <wopi desc="Allow/de..... Add a line below it, swapping in your Nextcloud domain name, with the dots "." escaped with backslashes "\.".
<host desc="Regex pattern of hostname to allow or deny." allow="true">nextcloud\.example\.org</host>
Save and close the file, then restart Collabora
sudo systemctl restart loolwsd
Test
There isn’t a whole lot of testing we can do on Collabora as an intermediate step, but this will at least confirm the server is running. This command asks Collabora for a file saying what it’s capable of:
cd ~
wget http://localhost:9980/hosting/capabilities
If it seems to run OK, you should now have a file called capabilites in your home (~) directory. Lets look at what’s inside:
cat ~/capabilities
{"convert-to":{"available":true},"hasMobileSupport":true,"hasTemplateSaveAs":false,"hasTemplateSource":true,"productName":"Collabora Online Development Edition"}Looking good!
Configure Apache
In this situation, all Apache has to do is act as a proxy between Collabora and the internet – we can’t connect it directly because otherwise the other sites (WordPress and Nextcloud) wouldn’t work.
Enable these 3 modules:
sudo a2enmod proxy proxy_http proxy_wstunnel
Edit the main Collabora SSL Apache configuration file:
sudoedit /etc/apache2/sites-available/collabora-le-ssl.conf
Change it to this:
<VirtualHost *:443>
    ServerName collabora.example.org
    ErrorLog ${APACHE_LOG_DIR}/collabora_error.log
    CustomLog ${APACHE_LOG_DIR}/collabora_access.log combined

    SSLCertificateFile /etc/letsencrypt/live/collabora.example.org/fullchain.pem
    SSLCertificateKeyFile /etc/letsencrypt/live/collabora.example.org/privkey.pem
    Include /etc/letsencrypt/options-ssl-apache.conf
	# Encoded slashes need to be allowed
	AllowEncodedSlashes NoDecode

	# Container uses a unique non-signed certificate
	SSLProxyEngine On
	SSLProxyVerify None
	SSLProxyCheckPeerCN Off
	SSLProxyCheckPeerName Off

	# keep the host
	ProxyPreserveHost On

	# static html, js, images, etc. served from loolwsd
	# loleaflet is the client part of Collabora Online
	ProxyPass           /loleaflet http://127.0.0.1:9980/loleaflet retry=0
	ProxyPassReverse    /loleaflet http://127.0.0.1:9980/loleaflet

	# WOPI discovery URL
	ProxyPass           /hosting/discovery http://127.0.0.1:9980/hosting/discovery retry=0
	ProxyPassReverse    /hosting/discovery http://127.0.0.1:9980/hosting/discovery

	# Capabilities
	ProxyPass           /hosting/capabilities http://127.0.0.1:9980/hosting/capabilities retry=0
	ProxyPassReverse    /hosting/capabilities http://127.0.0.1:9980/hosting/capabilities

</VirtualHost>
Basically, the bits we’ve added are a two-way connector between Apache and Collabora, and it needs slightly different things for all of the different features.
Reload Apache.
Configure Nextcloud
- Log into Nextcloud with your admin account.
- Click on the circle with your initial in the top right corner, choose Apps.
- Click on Office & text from the menu on the left.
- Find Collabora Online and click Download and enable

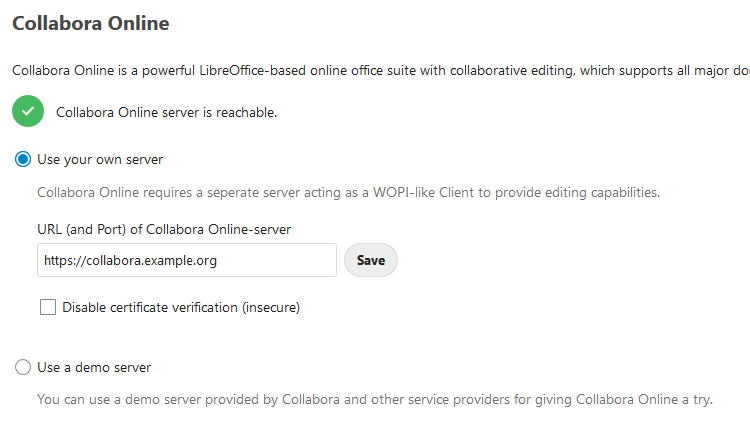
- Click on the circle with your initial in the top right corner, choose Settings.
- Click on Collabora Online near the bottom of the menu on the left.
- Choose Use your own server
- Enter your Collabora domain name with the https:// and then hit save.
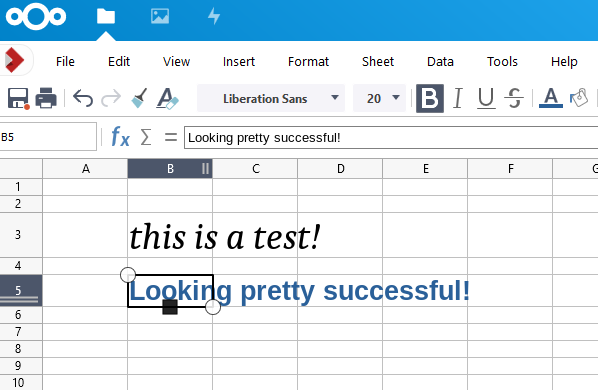
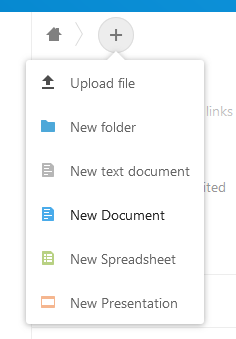
Now go back to the files section and give it a try!
- You should have the option to create a New Document, New Spreadsheet or New Presentation from the “+” icon.
- Or if you have any files on Open Document (.odt, .ods, .odp) or Open Office XML (.docx, .xlsx, .pptx) formats you can try opening them. They should open for editing in Collabora: